

The Floyd Rose double locking Tremolo system is widely regarded as the first locking tremolo system when he first invented it in 1970’s. Floyd D. Rose invented this system in the early 1970’s, with the first prototype built around 1976. He refined it through additional prototypes in 1977 before receiving the key U.S. patent on October 23, 1979.
Floyd Rose passed away in early 2025 at age 77 so I’ll never get the chance to meet him. If I had gotten to meet him, I honestly don’t know whether I would hug him or strangle him! The tremolo system is absolutely brilliant when it’s all setup up and working correctly. You can abuse the whammy bar to your hearts content and it will stay in tune, but, whilst changing strings is a bit more complicated, if you ever want to change the gauge of the strings or drop tune the E string to D or lower, the balance of the entire system is thrown out and it can be a painful experience to balance it again.
Anatomy of a Locking Tremolo System
The locking tremolo consists of three parts. First there is the locking nuts at the top of the fretboard usually consisting of three Allen (hex) bolts which clamp the top of the strings before the tuners.
Next there is the bridge. The action and intonation can be adjusted here, this is where the ends of the string are clamped rather than threaded though like other bridges and also there are some fine tuners for each string.

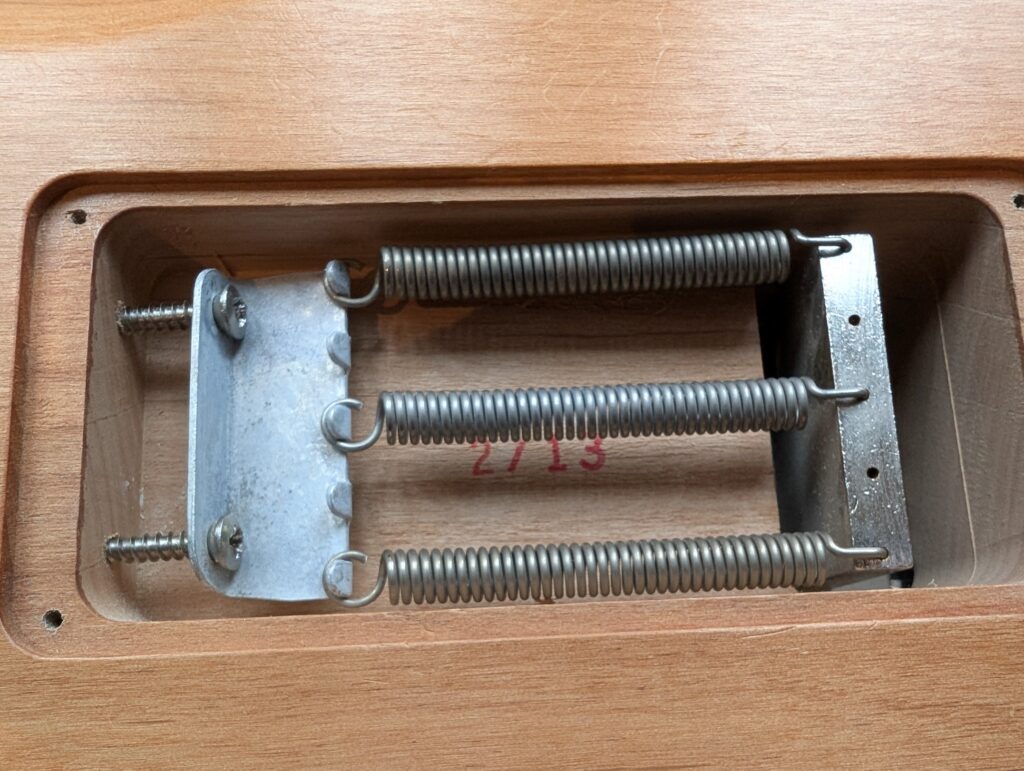
Finally in the back of the guitar you will find the springs which counterbalance the tension of strings. When the locking tremolo is set up and balanced, the bridge should be perfectly flat.
What You’ll Need
- New set of strings.
- String winder (optional but makes life easier).
- Wire cutters.
- 3mm and 2.5mm hex keys (usually included with your guitar).
- Tuner (clip-on, pedal, app – anything accurate).
- Soft cloth and, if you want, fretboard cleaner/conditioner.
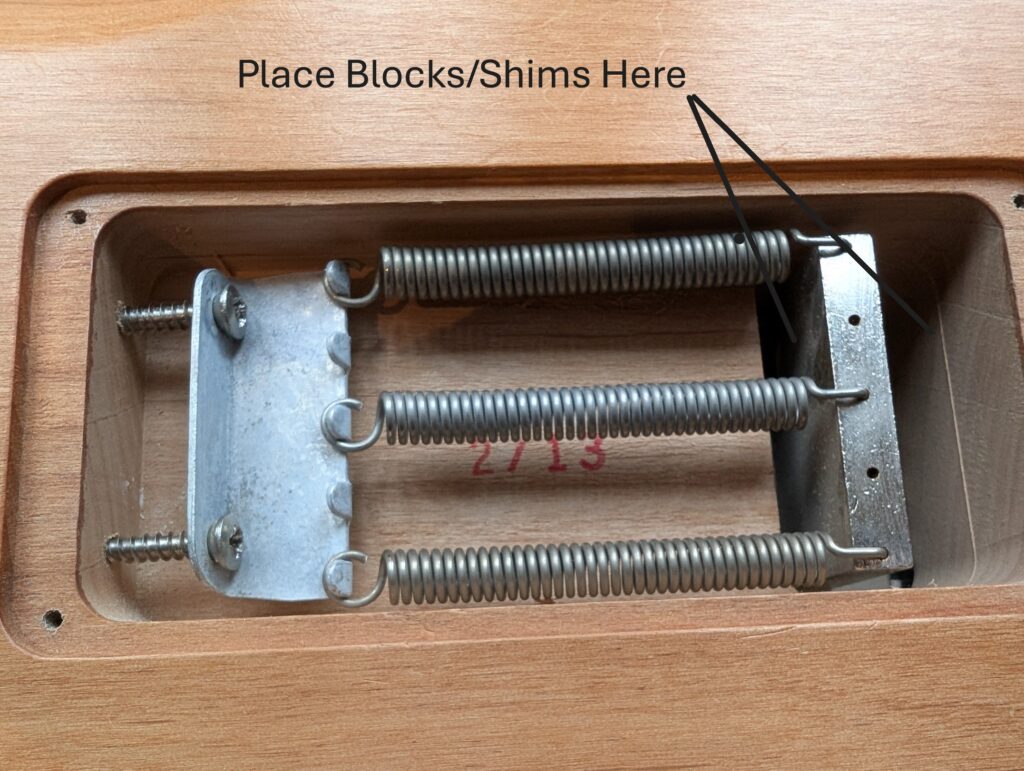
Step 1: Immobilise The Bridge
I have found that this makes it far easier to change the strings. Simply place an obstruction such as two bits of wood cut to size or stack it out with some plastic shims/packers either side of the tremolo block at the back of the guitar to stop it moving during the string change.
Step 2: Unlock the Nut and Loosen the Strings
Start by setting the fine tuners at the bridge to halfway — this gives wiggle room later for precise tuning. Then, use the correct hex key to loosen the locking nut clamps at the top of the neck. Now unwind each string slowly to release tension.
Step 3: Remove the Old Strings
Each string is clamped into the bridge block rather than threaded through like on a fixed bridge. Use your hex key to slightly loosen the saddle clamp screw for that string. The small metal block will release, and you can remove the string end from the saddle.
At this point you may want to apply fretboard cleaner & conditioner.
Cut off the ball end of the new strings and insert the freshly cut end into the saddle slot, tightening the clamp screw securely — but don’t overtighten it (I did this once!) or you will strip the threads of the screw and then you’ll need a new saddle slot.
Step 4: Install and Tune the New String
Good stringing at the tuners is the key to tuning stability. A simple, reliable method:
- Pull the string up to its tuner, all the strings should be on inner side of the guitar.
- Wrap the string round once below the hole in the tuner peg.
- Wrap the string round again above the hole in the tuner peg.
- Stick the end of the string through the hole and pull tight. This locks the string in place and increases tuning stability.
Repeat for all six strings, working methodically (for example low E to high E).
Step 5: Tune & Lock
Tune each string in turn, once all strings are in tune, remove the blocks/shims/packers from the tremolo block. If you have changed the gauge of the strings or the tuning it is likely that the tremolo will no longer be flat and the guitar will be out of tune. If you have changed to the same gauge strings it is likely that everything should still be roughly in balance. In any case follow these steps if the plate is out of balance:
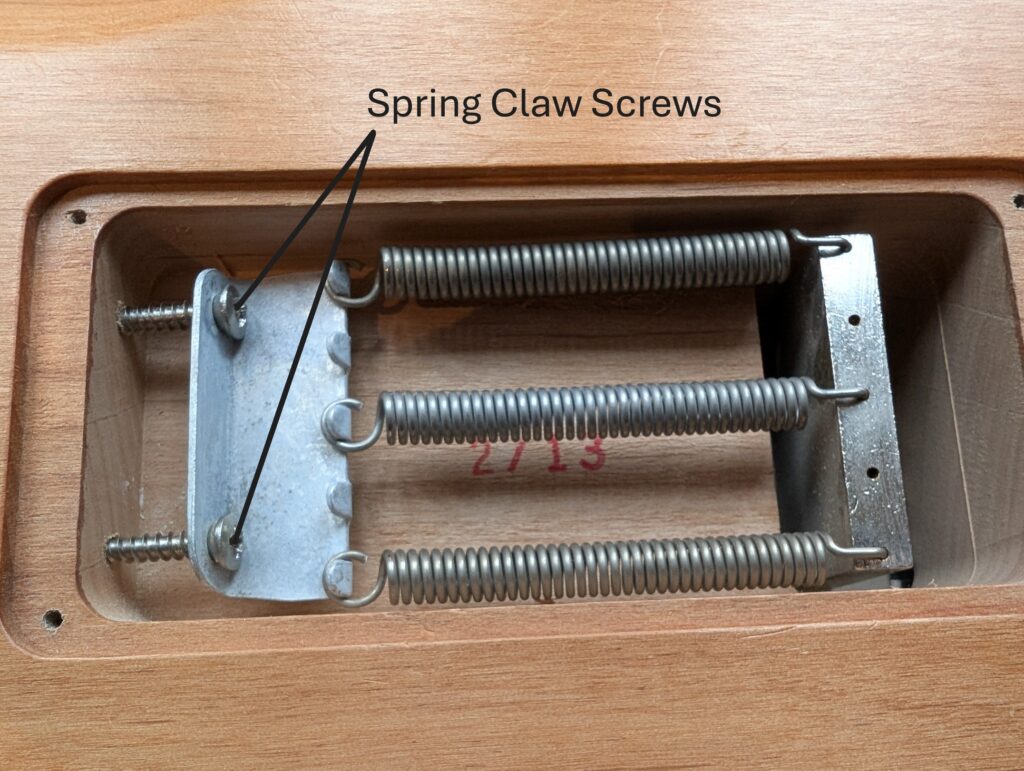
- If it’s tilting forward , tighten the spring claw screws (turn clockwise) equally on the back of the guitar.
- If the tremolo plate is titling backwards, loosen the spring claw screws (turn anti clockwise) equally on the back of the guitar.
- You should find that as the plate levels, the guitar will become in tune again or not far off. Adjust the tuning now so that it is in tune again. If necessary, you may have to adjust the spring claws to level out the tremolo and retune again, but if you have blocked the tremolo during the change then you should have to do this fewer times!
Step 6: Lock it down
When everything feels stable and the tremolo returns to a neutral position, lock the nut clamps again. These should be tightened a little more than finger tight, do not over tighten.
Use the fine tuners at the bridge to bring each string into perfect tune.
Step 7: Stretch and Settle
Play some wide bends and light tremolo dips to ensure the strings are stretching evenly. Retune again using the fine adjusters. After 10–15 minutes of normal playing, tuning stability should lock in beautifully.
Final Thoughts
Changing strings on a locking tremolo might take a little longer, but once you’ve done it a few times, it becomes second nature. The payoff — a guitar that stays perfectly in tune even after wild dive-bombs — is well worth the effort.
I hope this guide is useful, if you have any ideas about subjects for beginners you would like to see me writing about, please leave a comment below or send me an email via the contacts page.