Why learn Musical Notation
As a beginner guitarist, you may have come across something called guitar tab. Whilst I have nothing against guitar tab, I would argue that the goal of every musician should be to at least have a basic understanding of musical notation as it promotes a deeper understanding of the theory behind music.
Taking the time to learn musical notation has the following advantages over guitar tab and is why you should aim to become familiar with it.
1) Rhythmic precision: Notation explicitly indicates note duration (rhythm) where as guitar tabs often lack timing information entirely. This allows you to play a piece without having to hear a recording first.
2) Universal communication: Musical notation is a universal language used by all instruments. You can share a sheet of music with a pianist or a saxophonist, whereas they likely cannot read guitar tab.
3) Expressive detail: A professional score includes nuanced instructions for dynamics (volume), articulation (staccato, legato), and tempo changes that are frequently missing from guitar tab.
4) Tonal Freedom: Because notation focuses on pitch rather than position, it gives you the flexibility to choose the best place on the neck for a specific tone or ease of movement.
5) Professional Musicians: if you want to make music to this level, i.e. as a session guitarist, then learning to read music is essential.
So, if I’ve persuaded you to at least think about learning music, let’s go through some of the basics to start your journey into learning how to read music.
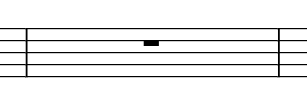
The Staff
The staff is the framework on which musical notation is based. It consists of five horizontal lines called stave lines. Each stave line and space in-between each line is assigned a pitch which is determined by the clef. Think of it like a graph where the vertical represents the pitch and the horizontal determines the time. The staff is divided up into vertical lines, the space in between the lines is known as a bar. The bar represents an interval of time within the musical notation.
Clefs
There are two clefs, the treble clef and the bass clef denoted by the symbols below. These are at the beginning of every piece of music.
The treble clef is for higher register of notes. for example the right hand of a piano, violin, flute etc. As guitarists we are only concerned with music which has a treble clef.

The bass clef is for lower registers of notes. for example the left hand of a piano, cello or bass guitar. I’ll point out the differences between the two as we go through the article so you appreciate any differences.

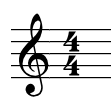
Time Signature
The time signature is two numbers vertically stacked at the beginning of the piece of music and they describe how the rhythm is organised into beats per bar. The top number represent the number of beats in a bar, the bottom number represents what kind of value of note represents one single beat. The most common time signature you will come across is 4/4 which means there are 4 single beats in the bar.
Note Names
In the treble clef a note on the stave lines are represented as follows:
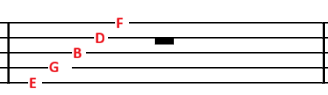
A useful mnemonic from the bottom note to the top is Every Good Boy Deserves Football.
The spaces in-between the staves are represented as follows:

The treble spaces from bottom to top spell FACE to help you remember.
For information only, as guitarists are not usually concerned with the bass clef is that all notes are lowered one position in the bass clef so that if the treble clef notes on staff lines are E-G-B-D-F, in the bass clef they become G-D-B-D-F-A (Good Boys Do Fine Always). For the spaces F-A-C-E becomes A-C-E-G (All Cows Eat Grass).
It’s worth mentioning that notes can be extended above and below the staff like this (note the direction of the stem changes if the note is above or below the middle of the staff):
Below the staff, the notes are written with a stave line above or through the note which effectively represents the extended staff, so the lowest E string on the guitar is represented like this:
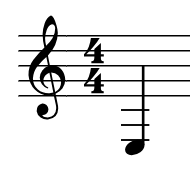
and the notes in the spaces above are G,B,D. The notes on the lines above the low E are F,A and C.
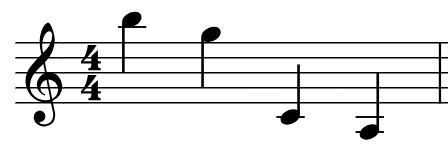
Above the staff, the same representation is used, The E note on the 12th fret of the high E string is represented by:
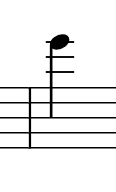
The notes on the lines leading up to this note are A-C. and the spaces are G-B-D
Above the 12th fret on the E string these notes are represented by further additions to the staff, which now repeat the original notes of the stave i.e. F-A-C-E for the spaces and E-G-B-D-F for the stave lines.
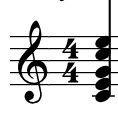
A chord or playing any number of notes at the same time is represented by multiple notes on the same stem, for example an open C chord would be written like this:
Timing Is Everything…….
Not only do the notes represent pitch, they also represent time by their appearance.
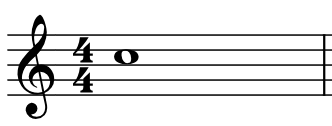
The semibreve represents a note that lasts for 4 single beats:
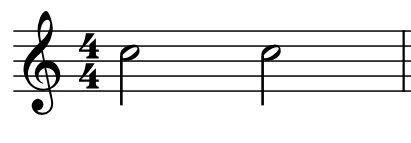
A minim represents a note that lasts for 2 single beats:
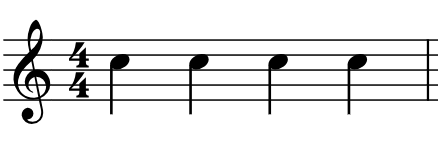
a crotchet represent a note that lasts for a single beat:
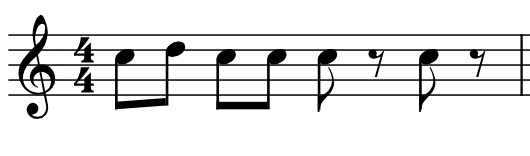
a quaver represents a note that lasts for ½ a beat, note the two forms of the note i.e. when they are next to each other and when they are single. Because the notes should last ½ a beat there are squiggly lines in between the single quavers that represent a ½ beat rest where a note should not be heard:
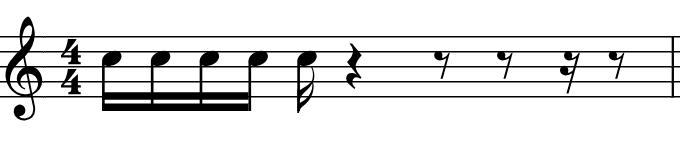
a semi- quaver represents a note that lasts for 1/4 of a beat, again note the differences between notes next to each other and individual notes. The rests are made up of full beat rests 3 ¼ beat rests and ⅛ beat rests to make up the full count of 4 in the bar.
and a demi-semi quaver represents a note that lasts for 1/8 of a beat, the other squiggly lines represent rests on beats where notes are played. The rests consist of whole beat, ¼ beat, ⅛ beat and 1/16 beat.

Key Signature, Sharps and Flats
When a # appears next to a note like this:
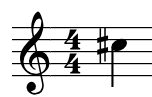
play the note a semitone higher, so in this example, this C note becomes a C# note.
when a b appears next to a note like this:
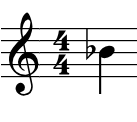
play the note a semitone lower, so in this example, the B note becomes a Bb note.
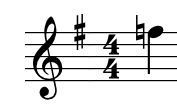
You may notice that a combination of sharp and flat symbols appear at the beginning of the music near the time signature, this is called the key signature and a particular combination of these sharps and flats show you the key of the music. It also follows that the sharps and flats in the key signature will not be repeated in the musical notation later on. Take this example below:
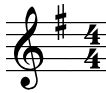
This is the E Minor key Signature, which has a sharp on the F note, for the rest of the music, you should play an F# every time an F is written unless otherwise noted. For example if a natural symbol appears next to an F note in the E minor Key signature, you should play an F, not an F#.
There are a number of major and minor key signatures and the only way of recognising the combinations is practice. There are numerous charts showing key signatures on the internet to help you memorise them.
Putting It All Together
Now for a bit of fun, here is a well known guitar riff written in musical notation. Have a go at playing it and see if you can work out the song, but before you there are a couple of new items I need to tell you about. The dot after the low E string note means you must extend the duration by ½ a half of the original note. So in this case the first note is a crochet representing one beat so let it ring for an extra half beat. Also you may notice a tie between the D notes at the end of the 1st and third note, this means play it once and let it ring for the value of the second note. I think the original track is in E major but i haven’t used that here for simplicity’s sake.

Here’s another well known guitar riff. I’ve included the E major key signature so remember to put all the sharps in for those notes or it will sound wrong!
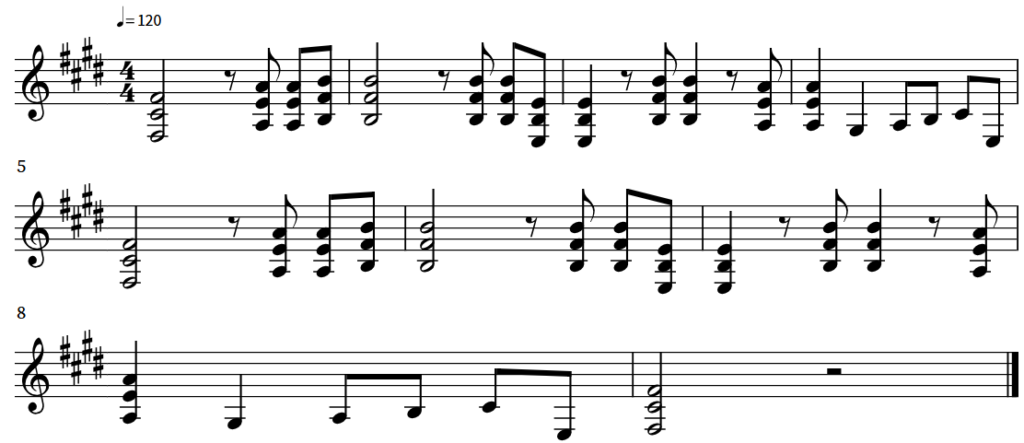
no prizes for the correct answer other than being the first in the comments – let me see your answers by leaving a comment below.
Final Thoughts
This is a very brief introduction to musical notation, although the information I’ve given should take you a long way in being able to read music. The only way to get good at it is to practice. One further piece of advice I would give, and this applies to guitar tab as much as musical notation. Ultimately, it is better to memorise the piece of music you are trying to play otherwise, the musical notation itself can become a crutch of sorts, where you need it in front of you to actually play the piece. This is not ideal, so use both musical notation or guitar tab to learn how to play a piece, then do your best to memorise it by practicing sections over and over again till it’s in your head. That way, once it’s learnt, your fingers move almost automatically and you can concentrate on putting some expression into your music.
I hope you’ve found this article useful, let me know your thoughts in the comments below.